
As a list of the top 10 MMA takedowns can vary a lot from person to person. I am not saying this is either right or wrong but simply my take on the matter. First I’m gonna start with a couple of takedowns from the clinch. Since the clinch is often somewhere you will end up in an MMA fight. Everything is explained based on an orthodox stance.
So here is my list of the Top 10 MMA takedowns.
Single leg
Often performed against the cage. You will need to grab a hold of one of your opponents’ legs while you still keep good pressure and a good posture to prevent getting hit with strikes. From here you can do multiple different variations of takedowns. Here is one I frequently use.
First, you put shoulder pressure on the opponents’ leg. You then swing your right leg in a 90-degree angle backward while you turn your whole body around towards the side of where you have your opponents’ leg trapped. This will cause him/her to lose balance and fall.
Pros:
- Easy to abort attack if you feel like your position is getting compromised
- Wide range of choices from the single-leg position
Cons:
- Needs a lot of training to get it right
- Opponent’ can counter in many ways if you don’t keep good posture

Arm drag to double leg
Make sure to get a grip of your opponents left wrist with your right hand and grab the inside of his/her tricep with your left hand. Then drag the tricep while you throw the wrist to the left and shoot. Now there are multiple different variations on how you perform the double leg after the arm drag.
But I often find the easiest one to just ram your opponent and keep driving him in a circle until the takedown is finished. Some people prefer to hook a leg around the ankle and perform more of a trip.
Note: Timing is key when doing an arm drag. Make sure to time your opponents’ movement. So that when he/she moves forward you use that momentum to further knock them off-balance.
Pros:
- Possibility to hurt your opponent
- Less likely to get stuck in a guillotine compared to a regular double-leg
Cons:
- This technique will require the timing to be really good
Over-under hip throw
this is somewhat of a favorite move for me as you won’t risk too much if you don’t succeed as you will maintain an underhook at all times. It’s also a great move for when you succeed and end up on the ground as you will have an underhook already. I often use this move when wrestling against the cage.
First, you should establish an underhook and one overhook. Then put a lot of pressure on your opponent. Which will result in him putting a lot of press back. And that’s when you grab his/her right wrist with your left hand. And step in with your right foot in front of his left foot at a 180-degree angle and throws him/her over your hips.
Pros:
- You will land in a really good position (side control with an underhook)
- Low risk of compromising position if you fail
Cons:
- Opponents will usually only fall for it once

Side trip from the back
This takedown is my go-to move when I have my opponents’ back in a standing position. Therefore this is a takedown I just had to add to the list of Top 10 MMA takedowns. It’s easy to perform and will require minimum effort if executed correctly. I will usually lock my hands around the waist of my opponent with a steady grip, then push him slightly forward (with the help of a right knee to the butt if necessary).
And with the help of his forward motion, I will make him trip over my left leg while I drive him towards it and down the mat at the same time. After a while, you will notice that this motion will come pretty naturally.
Pros:
- Require minimum effort
- You can land in the most dominant position in MMA (Back mount)
Cons:
- You will first need to get to the back
- Opponent can reverse with a Kimura grip if you’re not cautious
Double leg against the cage
This takedown can be performed in probably a million different ways. But the keyword here is HIGH PRESSURE! Often you will end up in a clinch war against the cage. From here it’s very important to keep a high pressure and always fight for the dominant head position.
This can be done by keeping up a high volume of light strikes to give your opposition minimum rest. And use your hand to press his/her chin upwards. Once you get his/her head up to a position where you can press your forehead against his/her chin you should do that immediately.
Now when you control the head you will limit your opponents’ movement in general, and find yourself in a very dominant position. Just make sure not to lose head position! From here your opponent will try to keep a very broad base. But the higher your pressure is the lighter he/she will be to take down.
If you keep high enough pressure you will be able to simply level change and grab your opponents under the butt and complete the takedown.
Pros:
- Will drain your opponent of energy
- Very high success rate if performed correctly
Cons:
- Can backfire if not performed correctly
- Can set you up for a guillotine
Note: To complete this takedown you must keep a very high pressure. Otherwise your opponent will be able to keep a heavy broad base enabling you from establishing a strong grip and finishing the takedown. And possibly even loosing your dominant position.

High crotch
A high crotch is performed by locking your hands together between your opponents’ legs, and then simply lift him/her up to throw them off balance. In MMA this takedown is best performed against the cage. When your opponents’ back is facing the fence. First, you need to grab the single leg and press him/her against the cage. From here you move your hands up
towards the crotch, and step in with the leg behind your opponent to get in a better position for a lift. Then simply lift and throw him/her over. I find this useful if the opponent is focused on defending the single-leg takedown. Thereby enabling you to switch up and go for this instead
Pros:
- Almost guaranteed takedown if you manage to lift
- Low risk of compromising your dominant position
Cons:
- Can cost a lot of energy

Shooting double leg
To succeed with this takedown you will need to get the timing correct. An example of a fighter who’s used this very effectively is Georges st Pierre. And the reason for him being so successful with it is his timing. If you manage to time your opponent justs before he/she starts throwing a combination you will get a very high success rate with this double leg.
Make sure to shoot for the legs with your shoulder against your opponents’ hip and your hands on the back of the legs. Drive your head upwards while you sprint straight through him/her. This will prevent you from ending up in a guillotine once on the floor.
Pros:
- Very effective if timing is right
Cons:
- You can end up in a bad position if the opponent manages to sprawl
- Risk of getting a knee/uppercut to the face

Suplex
The suplex is a brutal takedown you perform from the back of your opponent by throwing them backwards to ultimately land on their neck. First off you will be having a steady grip around the waist of your opponent. Then you step in with your far leg to block his/her leg. And from here you squat down a little bit so your hips ends up under your opponents’ hips.
This will enable you to perform the throw with minimum effort. Then you simply throw her/him backward with a little twist. Make sure to follow through the whole way by arching your back while keeping your feet to the ground.
Pros:
- Can hurt your opponent and even result in a knockout
Cons:
- Takes a lot of practice to get right
- Can cost a lot of energy if performed incorrectly

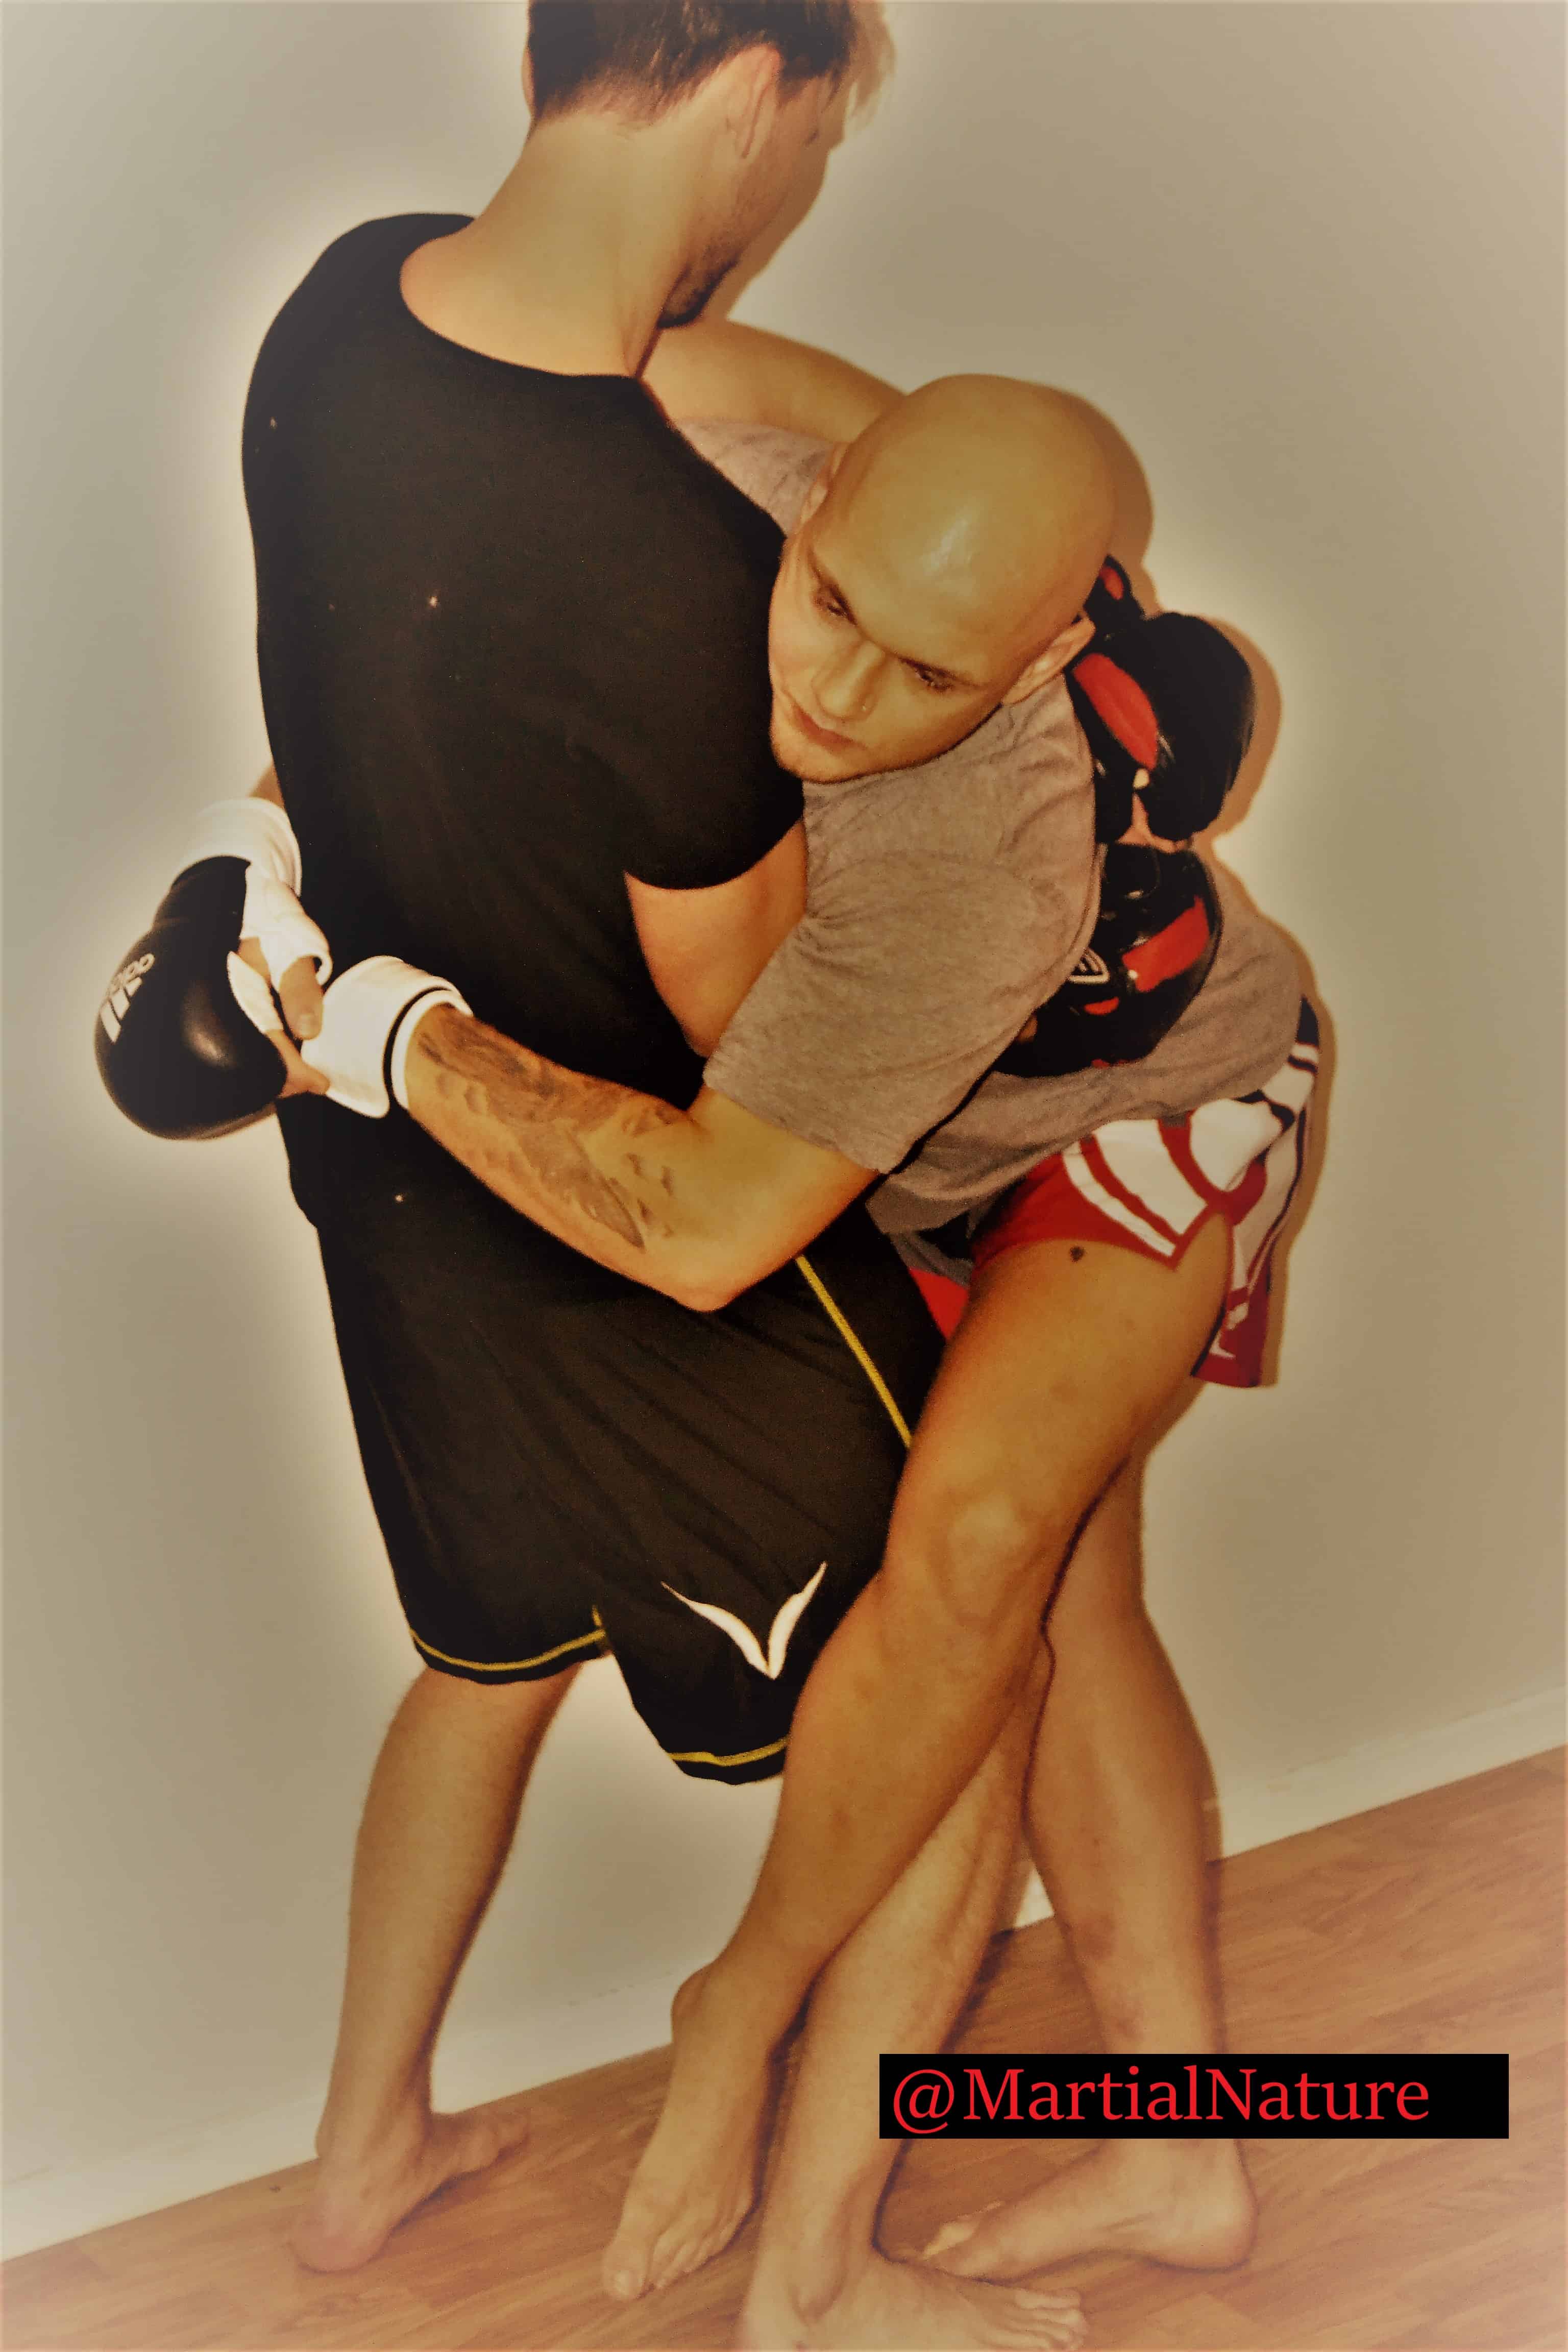
Inside trip
The inside trip is a must-have when doing an article about the Top 10 MMA takedowns. So simple but yet so effective. Performed easiest when you have your opponent against the fence. You simply hook your lead leg around his/her opposite side calf to trip the opponent over by driving their upper body towards the side you have hooked.
Make sure to have an underhook secured on the opposite side of the hooked leg. Optimal is an over/under bodylock. It can also be performed center-cage if you’re explosive and your opponent won’t see it coming. But as I said earlier it is best performed against the cage.
Pros:
- Very low waste of energy
- Simple
Cons:
- Pretty low success rate if performed center-cage

Outside trip
Well just as I could not make a list of the top 10 MMA takedowns without including the inside trip. I can’t do one without including the outside trip either. Best performed when in an over/under clinch. You will first need to secure a bodylock by just locking your hands between his/her back.
Then you hook your opponents’ leg on the side where he/she has the underhook and you fall down on your knee while you drive him/her over your leg to perform a trip.
Pros:
- Very energy efficient
- You will end up in half guard
Cons:
- You can end up in a bad position if trip not successful
If you found this article interesting you should read my article about Easy kickboxing combinations that you need to know. https://www.martialnature.com/easy-kickboxing-combinations/